Before starting your smart thermostat installation, check if it fits your home’s heating and cooling setup. Many brands, like Nest and Ecobee, have online tools to check compatibility. This step is essential before buying. This thermostat setup guide will lead you through setting up your smart thermostat. You’ll learn how to unpack, program schedules, and use AI for better energy savings. By following these steps to installing a smart thermostat, you’ll get the most out of your new smart thermostat.
Table of Contents
- 1 Installing a Smart Thermostat: Benefits and Key Features
- 2 Installing a Smart Thermostat: Prep Steps for Success
- 3 Installing a Smart Thermostat: Nest vs. Ecobee Comparison
- 4 Installing a Smart Thermostat: Step-by-Step Guide
- 5 Installing a Smart Thermostat: Nest Setup Guide
- 6 Installing a Smart Thermostat: Ecobee Setup Guide
- 7 Installing a Smart Thermostat: Program Your Schedule Easily
- 8 Installing a Smart Thermostat: Maximize Energy Savings with AI
- 9 Installing a Smart Thermostat: Connect with Smart Home Systems
- 10 Installing a Smart Thermostat: Enjoy Your New Setup Benefits
- 11 Frequently Asked Questions (FAQ)
Key Takeaways
- Verify your smart thermostat’s compatibility with your home’s system before purchase.
- Follow a step-by-step guide for a smooth installation process.
- Learn how to program schedules for optimal energy savings.
- Utilize AI features to enhance your smart thermostat’s performance.
- Discover tips for troubleshooting common installation issues.
Installing a Smart Thermostat: Benefits and Key Features
Smart thermostats have transformed home temperature control, bringing many advantages to homeowners. They integrate cutting-edge technology into your heating and cooling systems. This leads to better energy efficiency, enhanced comfort, and greater convenience.
This post contains affiliate links and we may earn a commission if you purchase through them.
What Makes a Thermostat “Smart”?
Smart thermostats stand out due to their advanced features. They include Wi-Fi connectivity, allowing remote temperature control via smartphone apps. They also have sophisticated sensors for detecting temperature and humidity. Models like the Nest Learning Thermostat and Ecobee Smart Thermostat boast AI-powered learning abilities. These adjust to your habits and preferences over time.
Energy Savings and Convenience Features
Smart thermostats are key to saving energy. They optimize your heating and cooling schedule, cutting down energy use and utility bills. They also come with handy features like geofencing and voice control for smart home systems. To achieve maximum energy savings, ensure your HVAC system is compatible and program your thermostat wisely.
Understanding smart thermostat benefits and features helps you choose the right one. Whether you aim to improve your smart home or lower energy costs, a smart thermostat is a valuable investment.
Installing a Smart Thermostat: Prep Steps for Success
Getting your home ready for a smart thermostat means checking if it’s compatible, gathering tools, and taking safety steps. A thorough preparation ensures your smart thermostat integrates smoothly with your HVAC system.
Checking Compatibility with Your HVAC System
Before you start, make sure the smart thermostat fits your heating, ventilation, and air conditioning (HVAC) system. Each smart thermostat has its own set of compatibility needs.
Nest Compatibility Requirements
Nest thermostats work with most HVAC setups, like conventional, heat pump, and multi-stage systems. But, always check your system’s compatibility on Nest’s official website.
Ecobee Compatibility Requirements
Ecobee thermostats also support a variety of HVAC systems, including conventional, heat pump, and multi-stage systems. Use Ecobee’s compatibility checker tool to see if your system is supported.
Tools and Materials You’ll Need
Having the right tools and materials before you begin installing a smart thermostat can make the installation easier. You’ll need a screwdriver, wire labels, and possibly a drill for mounting the thermostat.

Safety Precautions Before Installing a Smart Thermostat
Always prioritize safety when installing a smart thermostat. First, turn off your HVAC system’s power at the breaker panel. Make sure the power is off to avoid electrical shocks or injuries.
Installing a Smart Thermostat: Nest vs. Ecobee Comparison
When selecting smart thermostats, Nest and Ecobee are top contenders. Both enhance home comfort and energy efficiency with advanced features. It’s vital to compare their specifications and features to make an informed choice.
Nest Learning Thermostat Features and Specifications
The Nest Learning Thermostat learns your temperature preferences and adjusts automatically. It boasts a sleek design with a high-resolution display and remote control via the Nest app. Nest’s auto-scheduling feature creates a personalized heating and cooling schedule based on your habits.
Nest integrates with Google Assistant and Amazon Alexa for voice control. Its energy reports offer insights into your consumption, aiding in reducing waste.
This post contains affiliate links and we may earn a commission if you purchase through them.
Ecobee Smart Thermostat Features and Specifications
Ecobee Smart Thermostats are highly competitive with their range of features. The Ecobee thermostat has a touchscreen interface and supports remote sensors for optimal temperature control. Ecobee’s Smart Sensor technology ensures precise temperature monitoring and can lower energy bills.
Ecobee integrates with Amazon Alexa, Google Assistant, and Apple HomeKit. Its smart detection features automatically switch between heating and cooling, keeping your home comfortable.
By comparing Nest and Ecobee, you can choose the best smart thermostat for your needs. Consider compatibility with your HVAC system, ease of use, and additional features like smart home integration and energy reporting.
Installing a Smart Thermostat: Step-by-Step Guide
Installing a smart thermostat might seem complex, but breaking it down into simple steps makes it easier. Before starting, ensure you have all the tools and materials needed. Also, confirm your new thermostat is compatible with your HVAC system.
Turning Off Power to Your HVAC System
The first step is to turn off your HVAC system’s power. Find your home’s circuit breaker or fuse box. Switch off the breaker or remove the fuse that controls the heating and cooling. Make sure the system is fully off to prevent accidental start-ups or electrical shocks.
Removing Your Old Thermostat
Start by removing the faceplate of your old thermostat to expose the wiring. Take a photo of the wiring setup for later reference. This will help you correctly connect the wires to your new smart thermostat. Gently pull the thermostat away from its mounting plate and disconnect the wires. If it’s mounted directly to the wall, you’ll need to unscrew it.

Identifying and Labeling Wires
Identify and label each wire from your old thermostat. Common labels include R (power), W (heating), Y (cooling), G (fan), and C (common). If your wires don’t match these labels or if you’re unsure, refer to your HVAC system’s manual or seek professional help. Correct identification is key for proper installation.
Mounting the New Backplate
Mount the new backplate for your smart thermostat using the provided screws. Make sure it’s level and securely attached to the wall. This step is vital for both the installation’s success and the thermostat’s appearance.
Connecting the Wires Properly
Use the photo you took and the manual that came with your smart thermostat to connect the wires. Match each wire to its corresponding terminal on the new thermostat’s backplate. Secure the wires under their respective terminals and tighten the screws to prevent them from coming loose.
By following these steps, you’ll successfully install your smart thermostat. You’ll then enjoy the benefits of a more comfortable and energy-efficient home.
Installing a Smart Thermostat: Nest Setup Guide
After installing your Nest thermostat, follow these steps to set it up and control your home’s climate. The Nest Learning Thermostat is designed to be intuitive. This makes the setup process straightforward and user-friendly.
Physical Installation Specifics for Nest
Mounting the Nest thermostat to the wall and connecting it to your HVAC system is the first step. Ensure the Nest backplate is level and securely fastened to the wall. Proper alignment is critical for the device’s accuracy. For specific wiring configurations, refer to the manufacturer’s instructions.
Initial Configuration and Wi-Fi Connection
To begin using your Nest thermostat, you must complete the initial configuration. This includes setting the date, time, and your preferred temperature scale. Connecting your Nest to Wi-Fi is essential for remote access and smart features. Navigate to the Wi-Fi settings on your Nest, select your network, and enter your password to complete the connection.
The Nest thermostat’s interface is intuitive, allowing easy adjustments. Use the ring to navigate through the menu, select your desired settings, and adjust the temperature. Familiarize yourself with the different modes, such as Home, Away, and Eco, to maximize energy savings.
Setting Up the Nest Mobile App
To control your Nest thermostat remotely, download and install the Nest mobile app. The app lets you adjust the temperature, change settings, and monitor your energy usage from anywhere. Ensure your smartphone is connected to the same Wi-Fi network as your Nest thermostat for seamless integration.
| Feature | Description | Benefit |
|---|---|---|
| Remote Access | Control your thermostat from anywhere using the Nest mobile app. | Convenience and energy savings. |
| Energy Reports | Detailed energy usage reports to help you understand your consumption patterns. | Insights into energy efficiency. |
| Auto-Schedule | Nest learns your schedule and preferences to optimize heating and cooling. | Personalized comfort and energy efficiency. |
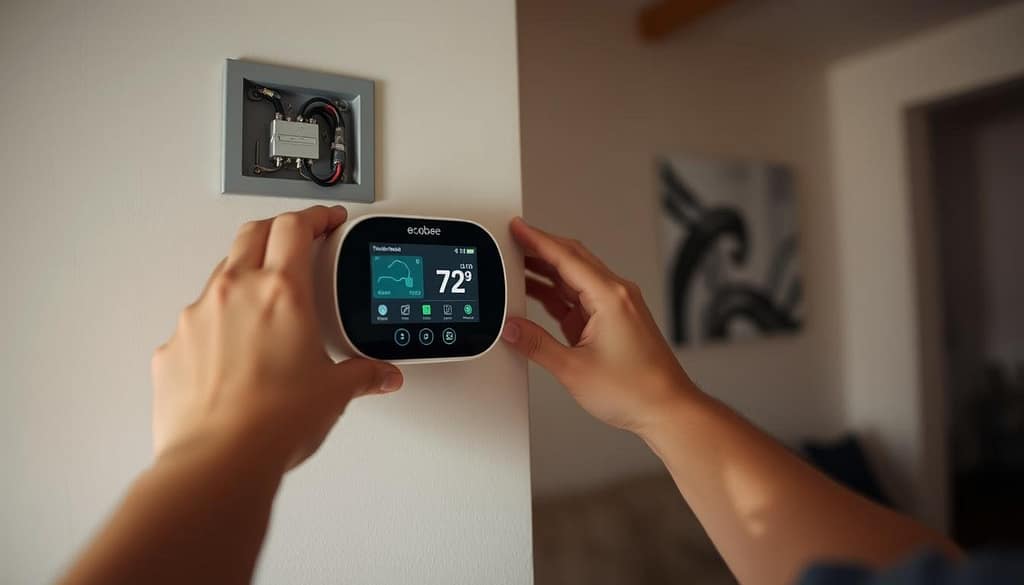
Installing a Smart Thermostat: Ecobee Setup Guide
Setting up your Ecobee Smart Thermostat is a straightforward process. It can be completed in a few simple steps. This guide will walk you through the physical installation, initial configuration, and how to use the Ecobee touchscreen interface and mobile app.
Physical Installation Specifics for Ecobee
The physical installation of your Ecobee thermostat involves a few key steps. First, ensure that the power to your HVAC system is turned off at the circuit breaker. Then, remove your old thermostat and identify the wires connected to it. The Ecobee thermostat comes with a detailed manual that will guide you through connecting these wires to the new device. Make sure to label each wire before disconnecting it to avoid any confusion during the installation process.
Initial Configuration and Wi-Fi Connection
Once the Ecobee thermostat is installed, you’ll need to configure it. Start by turning on the power to your HVAC system. The Ecobee thermostat will guide you through the initial setup process, including connecting to your Wi-Fi network. This step is critical for accessing remote control features and smart functionalities. Ensure you select the correct Wi-Fi network and enter your password accurately.
Using the Ecobee Touchscreen Interface
The Ecobee thermostat features an intuitive touchscreen interface. It allows you to control your heating and cooling systems easily. You can adjust the temperature, set schedules, and access various settings directly from the device. The interface is designed to be user-friendly, making it simple to navigate through the different options and settings.
Setting Up the Ecobee Mobile App
To get the most out of your Ecobee Smart Thermostat, download the Ecobee mobile app. The app allows you to control your thermostat remotely, monitor your energy usage, and receive important notifications. Setting up the app is straightforward: simply create an account, link your thermostat, and start controlling your home’s temperature from anywhere.
| Feature | Description | Benefit |
|---|---|---|
| Remote Control | Control your thermostat from anywhere using the Ecobee mobile app. | Convenience and energy savings |
| Smart Scheduling | Create schedules based on your daily routines. | Optimized energy usage |
| Energy Reports | Monitor your energy consumption and receive detailed reports. | Insights into your energy usage patterns |
Installing a Smart Thermostat: Program Your Schedule Easily
To maximize your smart thermostat’s benefits, programming it to your schedule is key. This approach leads to notable energy savings and improved home comfort. A well-set schedule prevents waste by ensuring your systems run only when needed.
Creating an Energy-Efficient Heating Schedule
Designing an efficient heating schedule requires insight into your daily habits and preferences. Begin by setting different temperatures for different times. For example, lower the temperature when you’re away or asleep, and increase it when you’re active.
Weekday vs. Weekend Programming
It’s wise to have separate schedules for weekdays and weekends. Weekdays often follow a more structured routine, while weekends are more flexible. Tailor your thermostat settings to match these variations for optimal efficiency.
Optimizing Temperature Setpoints
Choosing the right temperature setpoints is critical. The U.S. Department of Energy suggests keeping your thermostat at 68°F when you’re home and awake. Lower it when you’re asleep or away. Even a 1-2 degree change can significantly reduce energy use.
Setting Up Cooling Schedules
For cooling, adjust the temperature based on your presence and activity. Pre-cooling your home before you arrive is efficient, more so on hot days. Use your smart thermostat’s geofencing to start cooling as you near home.
Vacation and Away Modes
Most smart thermostats offer a vacation or away mode for extended absences. This feature prevents unnecessary energy use. You can set a specific temperature to maintain, balancing energy savings with home protection.
Installing a Smart Thermostat: Maximize Energy Savings with AI
Homeowners can significantly cut their energy bills by using AI in smart thermostats. Both Nest and Ecobee employ advanced AI to fine-tune heating and cooling schedules. This ensures peak energy efficiency.
Nest’s Learning Capabilities and Auto-Schedule
Nest’s AI learns your daily routines and preferences to adjust your temperature schedule. This feature, Auto-Schedule, optimizes energy savings while maintaining comfort. It does so by adapting to your habits over time.
Nest’s AI-driven features also detect when you’re away. It then adjusts the temperature to save more energy.
Ecobee’s Smart Features and eco+
Ecobee thermostats use AI to optimize energy use. The eco+ feature adjusts heating and cooling based on your routines, weather, and energy patterns. This ensures energy is used efficiently.
Ecobee’s smart sensors are key in this process. They detect occupancy and adjust temperatures in different rooms. This prevents energy waste in unoccupied areas.
Using Occupancy Sensors Effectively
Occupancy sensors are vital for smart thermostats. They detect when rooms are occupied or empty. This allows for significant energy savings.
For instance, setting your thermostat to focus on occupied rooms can save a lot of energy. Placing sensors in often-used areas helps the AI learn and adapt to your habits. This maximizes energy savings.
Installing a Smart Thermostat: Connect with Smart Home Systems
To get the most out of your smart thermostat, think about linking it with other smart home systems. This move boosts your home’s automation, leading to a more efficient and convenient living space.
Connecting with Amazon Alexa and Google Assistant
Linking your smart thermostat with Amazon Alexa or Google Assistant is a simple step. It lets you adjust the temperature with just your voice. For example, you can say, “Hey Google, set the temperature to 72 degrees,” or “Alexa, increase the temperature by 2 degrees.”
Apple HomeKit Integration
For Apple users, pairing your smart thermostat with Apple HomeKit is a smart move. It lets you manage your thermostat through the Apple Home app or with Siri voice commands. This adds convenience to your daily routine.
IFTTT and Other Automation Options
IFTTT (If This Then That) is a versatile tool for automating your smart devices. By linking your smart thermostat with IFTTT, you can set up automated tasks. This could be changing the temperature when you leave or arrive, or turning off heating/cooling when you’re away. Such automation greatly improves your smart home’s efficiency and comfort.
| Integration Option | Benefits | Compatibility |
|---|---|---|
| Amazon Alexa | Voice control, smart home automation | Most smart thermostats |
| Google Assistant | Voice control, smart home automation | Most smart thermostats |
| Apple HomeKit | Siri voice control, Apple Home app integration | HomeKit-enabled thermostats |
| IFTTT | Custom automation recipes | IFTTT-compatible devices |
Installing a Smart Thermostat: Enjoy Your New Setup Benefits
By following the steps outlined in this article, you’ve successfully completed the smart thermostat installation and setup. You’re now ready to reap the rewards of your new device, including energy savings and increased convenience.
With your smart thermostat, you can enjoy a more comfortable living space while reducing your energy consumption. The best practices for smart thermostat setup ensure that you’re getting the most out of your device.
As you start using your new smart thermostat, you’ll appreciate the ease of controlling your home’s temperature remotely and the insights into your energy usage. Whether you’ve chosen Nest or Ecobee, installing a smart thermostat has been a great decision for your home and wallet.
Take full advantage of your smart thermostat’s features, and start enjoying the benefits of a more efficient and convenient heating and cooling system.
This post contains affiliate links and we may earn a commission if you purchase through them.
Frequently Asked Questions (FAQ)
What are the benefits of installing a smart thermostat?
Installing a smart thermostat saves energy and reduces utility bills by learning your temperature preferences and adjusting automatically. It enhances home comfort and allows remote control via a mobile app for added convenience.
How do I check compatibility when installing a smart thermostat?
When installing a smart thermostat, check compatibility using online tools from manufacturers like Nest or Ecobee. These tools confirm if the device suits your HVAC system. You can also review compatible systems on the manufacturer’s website.
What tools and materials do I need to install a smart thermostat?
The tools needed to install a smart thermostat vary by smart thermostat model. Common items include a screwdriver, wire strippers, and a voltage tester. A smartphone or tablet is also necessary for setup.
How do I program a schedule when installing a smart thermostat?
When installing a smart thermostat, program its schedule using the device’s interface or mobile app. Set a routine to adjust temperatures based on your daily activities. Features like vacation mode save energy while you’re away.
Can I integrate other systems when installing a smart thermostat?
When installing a smart thermostat, you can integrate it with smart home systems like Amazon Alexa, Google Assistant, or IFTTT. This enables voice control and automated temperature adjustments based on other devices.
What are the differences when installing a smart thermostat like Nest or Ecobee?
When installing a smart thermostat, Nest stands out for its learning capabilities, while Ecobee offers remote sensors and smart alerts. Your choice depends on specific needs and preferences.
How do I ensure a safe process when installing a smart thermostat?
To ensure a safe process when installing a smart thermostat, turn off your HVAC system’s power at the circuit breaker or fuse box. Use a voltage tester to confirm the power is off. Always follow the manufacturer’s instructions for your specific model.
Can I handle installing a smart thermostat myself or hire a professional?
Installing a smart thermostat yourself is possible for simple setups, but hiring a professional is wise for complex systems or if you’re uneasy with DIY projects. A professional ensures a safe and proper installation.